Welcome to the ultimate guide on brewing your own kombucha tea at home! If you’re a fan of this delicious and probiotic-rich beverage, why not try making it yourself? This step-by-step guide will walk you through the simple process, ensuring you achieve the perfect balance of flavors and fizz.
Crafting your own kombucha tea allows you to control the ingredients, experiment with different flavors, and save money in the process. Plus, the satisfaction of sipping on a homemade kombucha that you brewed yourself is truly unbeatable!
In this guide, you’ll learn everything you need to know, from selecting the right tea and obtaining a SCOBY (symbiotic culture of bacteria and yeast) to fermenting and bottling your kombucha. We’ll also cover troubleshooting tips and explain how to achieve that signature effervescence.
Whether you’re a beginner or an experienced kombucha brewer looking to refine your skills, this guide has got you covered. So, grab your tea kettle and let’s get started on the journey to becoming a tea kombucha master in the comfort of your own home!
Keywords: brewing tea kombucha, home, ultimate guide, flavors, fizz, probiotic-rich beverage, fermenting, bottling, SCOBY, effervescence, tea kettle, homemade kombucha
What is kombucha?
Kombucha tea is a fermented beverage that is made by combining brewed tea with a SCOBY, which is a symbiotic culture of bacteria and yeast. The SCOBY consumes the sugars in the tea and produces beneficial acids, enzymes, and probiotics during the fermentation process. These compounds give kombucha its unique flavor and health-promoting properties.
Kombucha has been enjoyed for centuries and is known for its tangy taste and effervescence. It is a popular choice among health-conscious individuals due to its potential digestive and immune system benefits. By brewing your own tea kombucha at home, you have full control over the ingredients and can experiment with different flavors to suit your taste preferences.
Health benefits of kombucha tea
Kombucha tea is not only a delicious beverage but also offers a range of potential health benefits. The fermentation process creates a probiotic-rich environment, which promotes a healthy gut microbiome. These beneficial bacteria can aid digestion, support immune function, and improve nutrient absorption.
Additionally, kombucha contains antioxidants that help combat oxidative stress and inflammation in the body. Some studies suggest that the polyphenols found in tea kombucha may have antimicrobial properties and could potentially have a positive impact on heart health.
While more research is needed to fully understand the extent of kombucha’s health benefits, incorporating this probiotic-rich beverage into your diet can be a flavorful way to support your overall well-being.
Getting started: Equipment and ingredients needed
Before you embark on your tea kombucha brewing journey, it’s essential to gather the necessary equipment and ingredients. Here’s what you’ll need:
1. A large glass jar or brewing vessel: Choose a container that can hold at least 1 gallon of liquid. Make sure it’s made of glass, as plastic or metal containers can interact with the kombucha and affect the flavor.
2. Tea: The type of tea you use will influence the flavor of your kombucha. Black tea, green tea, and oolong tea are popular choices. Opt for organic, loose-leaf tea for the best results.
3. Sugar: Kombucha needs sugar to fuel the fermentation process. Organic cane sugar or white sugar are commonly used. Avoid artificial sweeteners or alternative sugars, as they may not provide the necessary nutrients for the SCOBY.
4. Water: Filtered or spring water is ideal for brewing kombucha. Chlorinated tap water can interfere with the fermentation process.
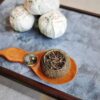
5. SCOBY: The SCOBY is the heart of the kombucha brewing process. You can obtain a SCOBY from a friend who brews kombucha or purchase one from a reputable source. Make sure it’s healthy and free from any mold or signs of contamination.
6. Starter liquid: Along with the SCOBY, you’ll need some starter liquid to kickstart the fermentation process. This can be leftover kombucha from a previous batch or store-bought unflavored kombucha.
Now that you have all the necessary equipment and ingredients, let’s dive into the step-by-step process of brewing your own tea kombucha.
Step 1: Brewing the tea
To begin, bring a large pot of water to a boil. The amount of water you’ll need depends on the size of your brewing vessel, but a general guideline is 4 cups of water for every 4 tea bags or 1 tablespoon of loose-leaf tea.
Once the water reaches a rolling boil, remove it from the heat and add the tea bags or loose-leaf tea. Steep the tea for about 5-7 minutes, or according to the instructions on the packaging. The longer you steep the tea, the stronger the flavor will be.
After steeping, remove the tea bags or strain the loose-leaf tea, and stir in the sugar until it dissolves completely. Allow the sweetened tea to cool to room temperature before proceeding to the next step. This is important to avoid damaging the SCOBY during the fermentation process.
Step 2: Adding the SCOBY
Once the sweetened tea has cooled, carefully pour it into your brewing vessel. Gently place the SCOBY on top of the tea, making sure it is fully submerged. The SCOBY may float or sink initially, but it will eventually find its balance.
If your SCOBY came with a layer of starter liquid, pour it into the brewing vessel as well. The starter liquid helps create an acidic environment that prevents harmful bacteria from growing and supports the growth of beneficial bacteria and yeast.
Cover the brewing vessel with a clean cloth or coffee filter and secure it with a rubber band or string. This allows air circulation while preventing any dust or insects from entering. Place the vessel in a warm, dark location where it can ferment undisturbed.
Step 3: Fermentation process
The fermentation process is where the magic happens. As the SCOBY consumes the sugars in the tea, it produces carbon dioxide, which gives kombucha its signature fizziness. The length of fermentation can vary depending on factors such as temperature and personal preference, but a general guideline is 7-14 days.
During fermentation, you may notice a new SCOBY forming on the surface of the liquid. This is known as a baby SCOBY and is a sign that the fermentation process is progressing successfully. It’s perfectly normal and indicates a healthy batch of kombucha.
To check if your kombucha is ready, carefully insert a straw or a clean spoon into the liquid and take a small sample. If it tastes slightly sweet and tangy, with a pleasant level of fizziness, it’s ready for the next step. If it tastes too sweet, allow it to ferment for a few more days. If it tastes too sour, reduce the fermentation time for future batches.
Step 4: Flavoring and second fermentation
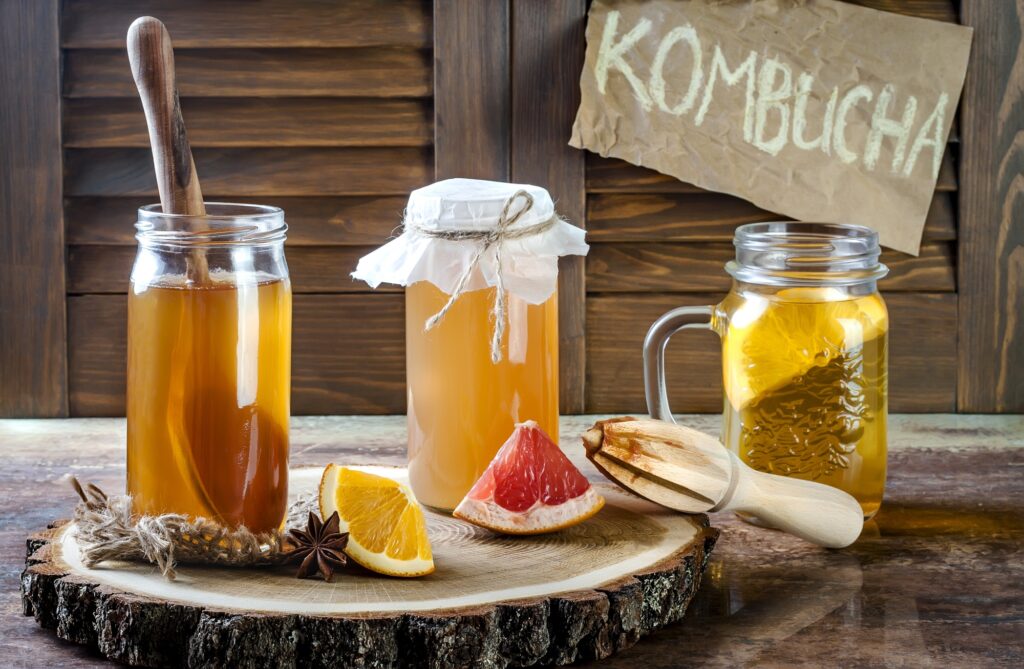
Once your kombucha has reached the desired level of fermentation, it’s time to add some flavor. While kombucha can be enjoyed as is, many people prefer to infuse it with additional flavors during a second fermentation.
To flavor your kombucha, you can add fruits, herbs, spices, or even fruit juices. Experiment with different combinations to find your favorite flavors. Simply add your chosen ingredients to the brewed kombucha, and transfer the liquid to airtight bottles or jars, leaving a small amount of headspace.
Seal the bottles or jars and let them sit at room temperature for another 1-3 days. This second fermentation allows the flavors to meld and carbonation to develop. Keep a close eye on the bottles during this time to prevent excessive carbonation that could lead to exploding bottles.
After the second fermentation, move the bottles to the refrigerator to halt the fermentation process. This will help preserve the flavors and maintain the desired level of carbonation. Your flavored tea kombucha is now ready to be enjoyed!
Step 5: Bottling and storing
Once your kombucha has reached the desired level of carbonation and flavor, it’s time to bottle and store it properly. Here’s how:
1. Carefully pour the fermented kombucha into clean, airtight bottles or jars. Strain it if necessary to remove any fruit or herb particles.
2. Seal the bottles tightly to prevent oxygen from entering and refrigerate them immediately. This will slow down the fermentation process and keep your kombucha fresh for longer.
3. It’s important to note that the longer you store kombucha, the more acidic it will become. Regularly taste your kombucha as it ages to ensure it maintains a flavor profile you enjoy.
4. Remember to reserve some of the kombucha and the SCOBY as starter liquid for your next batch. This will ensure a healthy fermentation process and maintain the balance of bacteria and yeast.
By following these bottling and storing guidelines, you can enjoy your homemade tea kombucha for weeks or even months, depending on your taste preference.
Troubleshooting common issues
While brewing tea kombucha at home is relatively straightforward, you may encounter some common issues along the way. Here are a few troubleshooting tips to help you overcome them:
1. Mold: If you notice mold growing on your SCOBY or in the liquid, discard the entire batch. Mold contamination is rare but can occur. It’s crucial to maintain a clean brewing environment and use healthy ingredients to minimize the risk of mold growth.
2. Weak or slow fermentation: If your kombucha is not fermenting as expected, ensure that the temperature is within the optimal range of 70-85°F (21-29°C). Lower temperatures can slow down fermentation, while higher temperatures can lead to overly sour kombucha.
3. Lack of carbonation: If your kombucha lacks fizziness, check that you’re using enough sugar during the brewing process. Insufficient sugar can limit carbonation. Also, ensure that your bottles are airtight during the second fermentation to trap the carbon dioxide.
4. Vinegar-like taste: If your kombucha tastes overly vinegary, it may have fermented for too long. Reduce the fermentation time for future batches to achieve a milder flavor.
Remember, practice makes perfect. As you continue to brew tea kombucha, you’ll gain confidence and develop your own techniques to create the flavors and effervescence you desire.
Enjoy!
Congratulations, you’ve now mastered the art of brewing your own tea kombucha at home! By following this step-by-step guide, you can enjoy the countless flavors and health benefits of this probiotic-rich beverage. Remember to experiment with different tea varieties, flavors, and fermentation times to find your perfect brew.
Brewing kombucha tea is a rewarding and creative process that allows you to take control of your health and indulge in a delicious beverage. So, grab your tea kettle, gather your ingredients, and let the journey to becoming a tea kombucha master begin! Cheers to your homemade kombucha adventure!